Pages

Photobucket Photobucket Photobucket Photobucket

Monday, May 31, 2010

June's Upcoming Events

Hey Penguins
Just a few hours ago Billybob has relased some sneak peaks of what is going to happen in June he also mentioned somthing about people who like the Sea will like what will be coming up this year wonder what he means. well read the Post:

Hello Penguins!


It's nearly June, and that means lots of new events are coming up fast!
Many of you have asked what adventures are on their way, and we wanted to give you a sneak peek. There's going to be even more new things for agents, and a TON of stuff for those of you who like the sea.
Well Isnt That cool heres whati think what these pictures are about:
1st Picture=-Somthing to do with this "Sea" Event as you can see there is an anchor on the flag perhaps this party will be like the underwater party in Febuary 2008.

2nd Picture-Looks like Some Type of Spy Gizmo or somthing like that maybe somthing we have to fix during a mission

and 3rd Picture-Kind of looks like a wig with leaves all i know it has to do with penguin styles which BTW comes out This friday.

So guys thats pretty much it well til next time waddle on
~Teddy259 CPJ Prez
Sunday, May 30, 2010

Club Penguin Mine's Tree Bigger

Hey Penguins!
Have any of you noticed that the tree in at the mine shack is starting to grow bigger Here is a picture of the tree that we started growing on earth day i wonder if anything will start to grow on it
Well This was just a little update also summer vaction on June 9th WOOT cant wait for that will til next time
waddle on

Club Penguin EPF Herberts Revenge Guides(Coming Soon)

Hey Penguins!

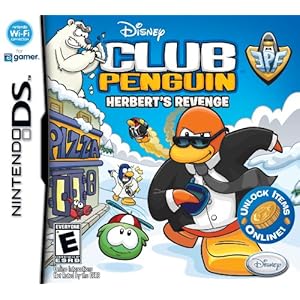
So i Just got Herberts Revenge yesterday and i am here to show you what comes with the game heres a picture of what comes with this Totaly Awesome game.
The Game Should Include the Following
-An EPF poster
-The Game
-A Code for online:
The Code Includes the Following:
-An EPF Uniform
-1500 Coins
-EPF spy phone
-Elite Puffle Whistle
and Then once you Put in the code here are 13 items you should recive in you inventory
-Flashlight
-Life Ring
-Bionculars
-Laptop
-Hiking Backpack
-Bowtie
-Ski goggles
-Black Sunglasses
-Orange Mining helmet
-Crab suit
-Spider suit
-Secret agent Tux
-EPF Shirt
and in addtion to that if your a memeber you can use the elite puffle whistle,the only puffle avalible to you right now is flare you just summon flare and he will follow you

 Flare Cannot be Kept at your igloo you cannot feed him or do anything like that only thing you can do with flare is walk around with him.Heres two of his actions Going through a fire hoop(right) is when you dance and him with just blue flames(left) is when you Press W or Wave
 Well Thats Pretty Much it I would seriously reconmmend get the game it has lots of cool unlockables and the game is seriously fun on a scale of 1-10 i would give it a 9.5 only because it needs more missions well guys thats it til next time waddle on
~Teddy259 Club Penguin Jammers President

Saturday, May 29, 2010

How to Become and EPF agent

Hey Penguins! 1st off i want to say sorry for being late like 1st the video would not upload so sorry well anyways heres the guide on how to be an EPF agent.ok heres how to be and EPF agent:
1.First throw a snowball at the target


2.Walk to the green square
3.Then Wait for it to say go
4.Then go to the red target as fast as you can

5.Throw a Snowball at Camera 2
6.Hide behind the pole and wait for 20 seconds

7.wait the the Cage to finish loading
8.DO NOT GO TO THE CAGE
9.Hit the Blue Box Instead
Well Thats it then The Secret Pillar will open and a little elevator go down the elevator and then you should be inside the EPF command Room and your spy Phone should be Upgraded
Heres a Picture of the EPF command room
And Then Heres An EPF Uniform you get from the game and an elite puffle like the ones from the first game
Well Thats All Well til next time waddle on Also i might be getting the EPF game Today or tommrow so yea keep on the look out for that
~Teddy259 Club penguin jammers

Thursday, May 27, 2010

Soccer Pitch Returns/Sports Catolog Cheats

Hey Penguins!
The Soccer Pitch Returns just 14 days before the World Cup Starts And Lemme Tell You the Soccer Pitch is WAY diffrent then it was last time it was here like they've added an annoucer both and concession stand new bleachers and the sports catolog and speaking of the sports catolog check out the cheat below


 Click on the Soccer ball next to the work SOCCER and you will find the Green Soccer Uniform
Haha well thats it also i will be uploading a video Soon And Stuff So Yeah For the EPF Test Well Cya

Hebert's Revenge FULL GAME GUIDE!

Hey there! Can't go further on Herbert's Revenge or want to do it the EASY way? Chekc meh guide!
Club Penguin: Elite Penguin Force: Herbert's Revenge


Have fun!


Mission 1 – The Elite Penguin Force
  1. Wait to arrive at the Command Room
  2. Talk to Dot
  3. Keep talking until the Director appears on the screen in the Command Room
  4. Talk to the Director until you are taken to the EPF Training Area
  5. Talk to the Puffle Trainer
  6. Once your done talking click on the Puffle Whistle and choose the red color Puffle
  7. Blow into your DS Microphone to call the selected Puffle
  8. Go through the door behind Rookie and Jet Pack Guy
  9. When you’re in the room, click on the Puffle then the box in the middle of the room
  10. Then use your DS Stylus to scroll to the right and do the same for the other box
  11. Now click the whistle again and call the Blue Puffle
  12. Click on the blue Puffle then the targets for it to throw snowballs at them
  13. Once you’ve done that go through the door all the way to the left
  14. Talk to Dot then the Director
  15. Click on the magnifying class in the bottom right corner (This is the Spy Log)
  16. Close the Spy Log and go through the tunnel behind Rookie and Jet Pack Guy
  17. When you’re at the River, click the box to collect the stuff inside of it
  18. Open your inventory, click and drag the rope to the anchor
  19. Now get the Jackhammer from your inventory, click the River with the Jackhammer on your stylus to wash it off
  20. Follow the onscreen instructions to fix the Jackhammer
  21. Once you’ve fixed the Jackhammer get it out of your inventory again, with it on your stylus scroll to the right and click the where the part of the ground is crumbling
  22. Either play the Jackhammer Game or skip it (play it to earn extra coins!)
  23. Talk to the team then continue through the tunnel
  24. Get the Rope and anchor from your inventory and click on the rock wall
  25. You can choose to play Grapple Gadget or skip it
  26. Once you’re at the top of the wall talk to the team
  27. Now talk just to Dot and choose the second option
  28. Talk just to Rookie and Jet Pack Guy and also choose the second option
  29. Open your inventory and drag the pole into the same slot as the Jet Pack
  30. Get the belt from your inventory and put it around the bars
  31. Get the Jet Pack attached to the pole and put it on the belt
  32. Follow the onscreen instructions
  33. Continue through the tunnel
  34. Talk to team, when your finished talking to them click on Dot, Rookie or Jet Pack guy
  35. Click the option saying you have an idea
  36. Follow the onscreen instructions
  37. Stack the penguins in this order: Rookie, Jet Pack Guy and Dot
  38. Talk to the Director
  39. Finish the mission!
Mission 2 – Secret of the Fur
  1. Talk to the Director
  2. Talk to Gary
  3. Get the wrench from your Spy Tools
  4. Follow the onscreen instructions to tighten the loose bolt
  5. Talk to Gary again, when your done click on the mission simulator to start
  6. When the mission starts talk to Gary and select the first option two times
  7. Click the Furensic Analyzer 3000
  8. Open your Spy Tools and get out the comb
  9. Comb the pink fur so it fits into the analyzer
  10. Talk to Gary
  11. Get the fur he gave you from your inventory and put it in the Analyzer
  12. Wait for it to analyze then talk to G and select the first option
  13. Open your map and go to the Plaza then to the Pizza Shop
  14. When in the Pizza Shop talk to the Chef, select the first option then the second option
  15. Take a hot sauce bottle and a chocolate syrup bottle
  16. Now go to the Coffee Shop and talk to the brown penguin behind the counter
  17. Select the third option then the first or second option
  18. Click on the Coffee Maker
  19. Get the wrench out of your inventory and click on the cable that says “Milk”
  20. Follow the onscreen instructions to connect it
  21. Grab the white coffee mug
  22. Get the chocolate syrup and put it in the bowl at the top of the coffee maker then turn the knob next to it and put it on “Hot”
  23. Now put the white coffee mug under the “Hot Chocolate” button
  24. Click the red button to pour hot chocolate, when its done put the mug back in your inventory
  25. Go to the Lighthouse and get the net from outside of the Lighthouse then put it in your inventory
  26. Now go to the HQ then into the Gadget Room
  27. Get the fan from the “Prototype” shelf
  28. Go back to the Lighthouse, go inside and get the rope hanging on the red row-boat
  29. Scroll over and go up to the Beacon
  30. Open your inventory, drag the rope over to the same slot as the net
  31. Get the fan from your inventory and click on the Jet Pack Fuel floating in the air
  32. Open your Spy Tools and get the scissors to cut the balloon and get the Jet Pack Fuel
  33. Go back to the HQ then into the Gadget Room and give Gary the Hot Chocolate, Hot Sauce and Jet Pack Fuel
  34. Talk to Gary, drag the substances into the Spy Goggles to calibrate them
  35. When your done put the Spy Goggles on and go to the Ski Lodge
  36. While in the Ski Lodge get the candle in between the couches
  37. Now go through the “Ice Fishing” Door
  38. Get the Rope/Net Trap from your inventory and click the tree
  39. Lastly, get the Candle and put it in the net
  40. Get Klutzy (trapped in the net) and the fur Herbert left behind
  41. Go back to the HQ, into the Gadget Room and give Gary Klutzy
  42. Click on the Analyzer, get the Fur from your inventory and put it in the Analyzer
  43. Talk to Gary to complete the Mission
Mission 3 – Questions for a Crab
  1. Talk to Gary, select the first option
  2. Follow Klutzy! (HQ, Gift Shop, Ski VIllage, Ski Hill then over the hill)
  3. Go to where the bush with the Puffle O’s are at then to where the Black Puffle is by the tree stump
  4. When you reach the Black Puffle scroll over to your left and go that way
  5. Scroll over till you see the bag of O Berries in the tree
  6. Get out your scissors and get them down
  7. Put them in your inventory
  8. Scroll right and go back to the Black Puffle
  9. Give him an O Berry
  10. Now scroll right and go towards the cave (where Klutzy went)
  11. When your there click on the Puffle Whistle and call the Black Puffle
  12. Open your inventory and get out an O Berry, now click on the small door that Klutzy went through
  13. When your inside the cave and get trapped by Herbert select any option (once he starts talking)
  14. After Herbert leaves keep scrolling right until you see a wooden contraption that says “Cage Lift”
  15. Get a O Berry and put it where the lever is with the green UP and DOWN arrows
  16. Now put an O Berry on the high-end of the water pipe
  17. Then finally put an O Berry on the platform by the sign that says “Cage Lift”
  18. When your out of the cage keep scrolling to the left until you come upon a table with Blue Prints, but them in your inventory along with the bottle of Hot Sauce
  19. Scroll to the right a little bit and get the anchor and the rope to the left of the anchor
  20. Open your inventory and drag the rope to the anchor to make a grappling hook
  21. Try and leave the cave by using the door (a big pile of snow will fall though and you will have to find another way out!)
  22. Open your inventory and drag the Hot Sauce bottle to the bag of O Berries to make a Spicy O Berry
  23. Give the Spicy O Berry to the Black Puffle and watch him burn a hole through the snow
  24. Exit the cave
  25. Scroll right and go towards the Tree Stump
  26. Now scroll all the way to the left and go towards the log
  27. Scroll all the way left again and go towards the Mountain
  28. Put your stylus over the Mountain and move it around until there is a Yellow Arrow then click there
  29. Open your inventory and get the Grapple from your inventory
  30. Follow the onscreen instructions and play Grapple Gadget or Skip it
  31. Go to the Plaza then into the Pizza Parlor
  32. Ask to the Chef for a Seaweed Pizza
  33. Put the Pizza in your inventory and go to the Ski Lodge
  34. Now through the Ice Fishing Door
  35. Grab the Pizza from your inventory and click on Herbert to put it next to him
  36. When Herbert moves to eat the Pizza click the Red Lever on the machine that Klutzy’s in
  37. Keep clicking until Herbert finishes his Pizza and turns on the machine
  38. Talk to Gary when he arrives
  39. Accept the call from Herbert
  40. Talk to Gary again and give him the plans back that you got from Herbert’s Den
  41. Keep talking to Gary until the Mission is over!
Mission 4 – Mysterious Tremors
  1. Talk to Gary, select any options
  2. Pick up the tan hat behind G
  3. Go to the Dock
  4. Talk to Herbert
  5. When your done talking to Herbert pick up the lantern by the tunnel
  6. Follow the map (Town, Snow Forts and Plaza)
  7. When you get to the Plaza the map will land in the green penguin’s newspaper, talk to him and ask if you can see the newspaper
  8. He will tell you he’s not finished but he could use a Pizza, scroll to the right and go into the Pizza Parlor
  9. Get the Pizza from the Chef and give it to the green penguin in line
  10. When walking to the green penguin select the first option
  11. Now go to the HQ then into the Gadget Room
  12. Talk to Gary, select the first option each time when talking to him
  13. When your finished talking to G scroll over to the right a little bit and get the hammer off the wall (its above the bowling ball/next to the wrench)
  14. Open your map and go to the Ski Village then into the Sports Shop
  15. Ask the Orange Penguin behind the counter for the box of pegs then put them in your inventory
  16. Go to the Beach and get the net outside of the Lighthouse
  17. Go into the Lighthouse and keep scrolling left until you see a Purple Penguin
  18. Ask him for one of the bottles of Cream Soda
  19. When your finished talking to him click on one of the Cream Soda barrels to put it in your inventory
  20. Now go to the Town then into the Coffee Shop
  21. Talk to the Brown Penguin and tell him that you’ll help him clean up the mess
  22. Click on the cookies spilt on the floor to help
  23. Take the cookies and drag them onto the plate
  24. After you’ve put the cookies on the plate the penguin will offer you some cookies, accept them and put one in your inventory
  25. Go back out to the Town
  26. Give the Green Puffle in front of the Night Club the Tan Fedora you picked up at the beginning of the mission
  27. Now give the Puffle the cookie
  28. When he knocks down the other half of the map pick it up
  29. Open your inventory and drag one half of the map to the same slot as the other half of the map to combine them
  30. Go back to the Dock and into the tunnels
  31. When in the tunnels try to go either left or right, it well tell you that its to dark. Open you inventory and click on your lantern then click on one of the tunnels again
  32. Follow the onscreen instructions to play Amazing Maze or Skip it
  33. When you’ve completed (or skipped) the maze you will end up at another tunnel but the gift shop is blocking it
  34. Get the Cream Soda from your inventory and then click on the Gift Shop
  35. Use your stylus to shake up the bottle of Cream Soda
  36. When the Cream Soda explodes and pushes the Gift Shop back up quicklyget the net from your inventory and click on the underneath of the Gift Shop
  37. Now get the pegs from your inventory and click on the underneath of the Gift Shop
  38. Finally, get the Hammer from your inventory and once again click on the underneath of the Gift Shop
  39. When finished, continue through the tunnel
  40. When you get to the end of the tunnel (where there is a hole into the Boiler Room don’t go into it yet)
  41. Scroll right a little bit until you see Herbert’s Drill (in the window is a “Snake Coin”)
  42. Click the Puffle Whistle and call the Red Puffle
  43. Now click on the Red Puffle once, then on the window of Herbert’s Drill
  44. The Puffle will shoot out of his cannon and break the glass, you can now collect the Snake Coin
  45. Continue into the Boiler Room
  46. Talk to Herbert until he hits the Boiler then runs off with Klutzy
  47. Accept the call from Gary
  48. Talk to Gary then close the Spy Phone and click on the Boiler
  49. Connect the pipes to stop the Boiler from exploding
  50. When you’ve finished fixing the pipes accept the call from Gary and report back to the HQ
  51. Talk to Gary and select any option until you complete the mission!
Mission 5 – Spy and Seek
  1. Talk to Gary (when talking to G select any option, first option, any option, any option, any option, any option, first option)
  2. Click on the tracking devices to put them in your inventory (make sure you get all three)
  3. Now put the deflated Rubber Duck in your inventory along with the blue prints on the wall
  4. Go to the Ski Lodge
  5. Scroll to the left and grab the Find Four pieces from the windowsill
  6. Keep scrolling left and grab more Find Four pieces from the stool
  7. Scroll left again until you find the pieces on the steps to the Attic
  8. Go upstairs to the Attic and get the pieces in between the Red and Blue couch
  9. Scroll over a little and get the pieces sitting by the couch (behind the box with the pink/purple octopus)
  10. Scroll more to the left and get the pieces sitting by the old record player
  11. Scroll once more and collect the pieces on the left and right of the rocking horse
  12. Before you go back downstairs get the piece of string/rope laying to the right of the rug/in front of the Find Four Game
  13. Go downstairs and give the pieces to the penguins playing Find Four
  14. Open your map and go to the Forest
  15. Pick up the sticks laying on the ground
  16. Open your inventory, Drag the Blue Prints to the Sticks to combine them, then drag the combined Blue Prints and Sticks to the string
  17. Before you close your inventory drag one of the tracking devices to the kite
  18. Now go to the Ski Hill
  19. Get the Kite with the Tracking Device and drag it to the pole in the middle of the mountain to set the Kite on it
  20. Go to the Plaza
  21. Click on the green and yellow penguins until the Puffle gets gum all over them
  22. Offer to help (first selection when asked)
  23. When they are done talking click on the gum stuck to their heads
  24. Ask to have the gum when the say they wish to repay you
  25. Go to the Dock
  26. Talk to the green penguin trying to start the boat (select the first option then the first option again)
  27. Follow the onscreen instructions to start the boat (use your stylus to pull the string until the boat starts)
  28. When your done ask to borrow the air pump
  29. Open your inventory, drag the gum to the rubber duck, then the air pump to the rubber duck
  30. Follow the onscreen instructions to fill up the duck (use your stylus to move the handle on the air pump up and down until its full)
  31. Once the rubber duck is full combine it with a Tracking Device
  32. Go to the Iceberg
  33. Get the duck from your inventory and drag it to the water to set the Tracking Device
  34. Go to the Mine
  35. Talk to Rory (select the first option then the second option)
  36. Follow the onscreen instructions to fix the trough
  37. When Rory asks if you have time for one more job select the first option
  38. Click on the Mine Cart to start
  39. Drag your stylus across the cracks in the Mine Cart to weld them
  40. Grab the sticks on the ground then open your inventory
  41. Drag the last Tracking Device into the Mine Cart
  42. Accept the call from Gary then report back to the HQ
  43. Talk to Gary then pick up the Spy Binoculars on the desk to the left of G
  44. Go to the Ski Lodge and then through the Ice Fishing Door
  45. Get the Binoculars from your inventory and scroll to the right
  46. When your done looking through them accept the incoming call from Gary
  47. Talk to Gary then close your Spy Phone
  48. Scroll right and click across the pond
  49. Follow the onscreen instructions and play Amazing Maze (or skip it)
  50. When you’ve finished Amazing Maze (or skipped it) pick up Herbert’s stolen Spy Phone by his fire pit
  51. Open your inventory and drag the Spy Phone to the Binoculars to combine them
  52. Scroll right until you see a big light green tree
  53. Drag the camera to the tree to set up the hidden camera
  54. Accept the incoming call from Gary
  55. Report back to the HQ
  56. Talk to Gary then watch the monitor
  57. When your done watching the monitor talk to Gary again until the mission is complete!
Mission 6 – Waddle Squad
  1. Talk to Gary (select the first option)
  2. Talk to Herbert then the Director
  3. When your done talking to them scroll to the right a little bit and pick up the solar panel by the box
  4. Go to the Beach and talk to Jet Pack Guy
  5. Finish talking to Jet Pack Guy then go inside the Lighthouse
  6. Scroll to the left until you see the shaking bottle of Cream Soda
  7. Put it in your inventory then go back to Jet Pack Guy
  8. Talk to Jet Pack Guy and select the second option then give him the Cream Soda
  9. Follow the onscreen instructions to divide the Cream Soda (click the bottle in the lower left for help)
  10. Once you’ve helped Jet Pack Guy go to the Town then into the Gift Shop
  11. Talk to the lime green penguin behind the counter
  12. Get the Table, Cloths, and the box with colored eggs/balls
  13. Go outside and drag the box to the right side of the Gift Shop (outside) then the Table and finally the cloths
  14. Go back inside and talk to the lime green penguin again
  15. Scroll to the left until you see the vault
  16. Click on the Puffle Whistle and call the Black Puffle
  17. Click the Puffle then the vault and it will fix it
  18. Grab the Snake Coin/Game Piece that is inside the vault
  19. Talk to Rookie
  20. Get the Solar Panel from your inventory and drag it to the magnet
  21. Follow the onscreen instructions to connect the Solar Panel
  22. Finish talking to Rookie then go to the Dock
  23. *Optional* When you get to the Dock talk to the Construction Worker and play Jackhammer
  24. Talk to the green penguin out on the dock
  25. Ask him for the rope
  26. Go to the Town then into the Night Club
  27. Scroll over until you see the trap
  28. Open your inventory and drag the rope to the pulley in front of the speaker/stairs
  29. Click the pulley again to try it (it will break)
  30. Now get the wrench from your Spy Tools and click on the pulley to loosen the screws (follow onscreen instructions)
  31. Follow the onscreen instructions to fix the pulley
  32. Accept the incoming call from Jet Pack Guy
  33. Close your Spy Phone and investigate the Herbert sightings at the Dock
  34. Accept the call from Rookie then head to the Night Club
  35. Talk to Herbert then click the red lever on the pulley to activate the trap
  36. Talk to Herbert again then accept the incoming call from Gary
  37. Close your Spy Phone and talk to Rookie
  38. Drag the lights above to shine on the Solar Panel to make the magnet stronger
  39. Keep clicking on the screen until Gary is done talking
  40. Once Rookie gives Herbert his Spy Phone and Herbert escapes finish talking with Gary to complete the mission!
Mission 7 – Veggie Villain
  1. Talk to Gary (select any option, first option, any option, third option, any option, first option then the first option)
  2. Click on the monitor
  3. Go to the Gift Shop
  4. Talk to Rookie then pick up the Corn Seeds to the left of Rookie
  5. Go upstairs and talk to Jet Pack Guy
  6. Pick up the Corn Seeds under the desk
  7. Accept the incoming call from Gary
  8. Enter the HQ using the secret entrance at the Sports Shop
  9. Talk to Gary
  10. Talk to Herbert then go to the Ski Village
  11. Talk to Jet Pack Guy and Rookie then scroll to the left and pick up the bag of marbles
  12. Go to the Lighthouse
  13. Talk to the lime green penguin with the guitar
  14. Get the wrench from your Spy Tools and give it to him
  15. Ask for the DVD box then put it in your inventory
  16. Now get the DVD that is under the Piano
  17. Follow the onscreen instructions to clean the DVD (drag the spray bottle over the DVD then use your stylus to wipe the DVD clean)
  18. Once you’ve cleaned the Disk put it in your inventory
  19. Go back to the Ski Village and give the DVD to Rookie
  20. Talk to Rookie then click on the transceiver behind the screen
  21. Get the wrench from your Spy Tools and loosen the bolts on the silver box on the right of the transceiver
  22. Follow the onscreen instructions to loosen the bolts
  23. When your finished talk to Rookie and Jet Pack Guy
  24. Open your map and go to the Mine
  25. Scroll to the right until you see the Corn Maze
  26. Follow the onscreen instructions to play Amazing Maze or skip it
  27. When you finish Amazing Maze or skip it you will end up at a river
  28. Click on the Puffle Whistle and call the White Puffle
  29. Click on the White Puffle then on the river and it will freeze a bridge across it
  30. Continue across the river and follow the onscreen instructions to play Amazing Maze or skip it
  31. Once you’ve completed Amazing Maze (or skipped it) you will be at a wall, there is a ladder but you can’t reach it. Get the popcorn kernels from your inventory and drag them into the LEFT torch to lower the ladder
  32. Go up the ladder
  33. Talk to Herbert
  34. When he is done talking unplug the computer
  35. Herbert will then teleport you, Rookie and a “gift” for Gary back to the HQ
  36. Talk to the team and find out whats going on
  37. When your finished talking to them scroll to the right and click the orange book
  38. A colored lock will pop out of the Command Room entrance, click on it
  39. Follow the onscreen instructions to unlock the lock
  40. When you’ve unlocked it talk to Dot
  41. You will all be teleported to the Ski Village and the Popcorn Bomb will explode
  42. Talk to Gary and Dot to find out what will happen to the PSA
  43. Keep talking to them until you finish the mission!
Mission 8 “Suspect at Large”
  1. Talk to the Director
  2. When your done talking to the Director, Dot and everyone else grab the crab costume on the table
  3. Click the EPF Penguin in the bottom right corner, then the suitcase. Now put the Crab Costume on
  4. Once you put the Crab Costume on talk to Dot
  5. You will be tested on how to walk like a crab, when the movement Klutzy is making appears on the top screen of your DS, match it with the same exact move from the three options on the bottom screen (you only have 5 seconds so don’t waste your time when choosing!)
  6. Talk to The Director and Gary until he gives you the Spy Camera 3000
  7. Gary will ask you to take a picture of him, click the EPF Icon in the bottle right and then click the camera
  8. Finish talking with them and then go to the Ski Lodge
  9. Go through the Ice Fishing Door and across the pond to Herbert’s old camp
  10. Collect all four pieces of the Blueprint (The first is on the cork board to the right of the gas can)
  11. Scroll to your left and there the second piece of Blueprint stuck under a rock. Click on the Puffle Whistle and call the Purple Puffle
  12. Click the Purple Puffle then the boulder, the Puffle will blow a bubble and lift the rock up. Grab piece of Blueprint and put it in your inventory
  13. Scroll more to the left and there will be another piece stuck in a tree. Click the Puffle Whistle and call the Green Penguin
  14. Click the Green Penguin then the piece of Blueprint stuck in the tree and the Puffle will retrieve it for you
  15. Keep scrolling to the left until you see a bucket of water, click on it to knock it over. It will be frozen with the last piece of Blueprint stuck in it.
  16. Use your Puffle Whistle to call the Yellow Puffle
  17. Click the Puffle then the Ice and the Yellow Puffle will break the ice
  18. Collect the last piece of Blueprint then follow the onscreen instructions to put the pieces together
  19. Once you’ve put all the pieces together answer the incoming call from Gary
  20. Talk to Gary then close your call from Gary and call Jet Pack Guy
  21. Talk to Jet Pack Guy then go to the Ski Hill
  22. When you arrive at the Ski Hill go straight
  23. Once you’ve done that follow these directions to get to Herbert’s old Cave Base: Right, Right then Right again
  24. When you get to the entrance of the Cave talk to Jet Pack Guy (select either option when he ask’s for orders)
  25. Go into the Cave and scroll to the right until you reach a pile of ashes
  26. Get the Mechano-Duster out from your Spy Tools
  27. Follow the onscreen instructions to clear away the ashes
  28. When your finished click the pieces of paper where the ashes were
  29. Follow the onscreen instructions again to put the pieces of paper together
  30. Answer the incoming call from Dot
  31. Talk to Dot then close your Spy Phone
  32. Exit the Cave
  33. Go to the right of the Cave (towards the tree stump)
  34. You will then find a fake rock, click on it
  35. Follow the onscreen instructions. If you can’t remember the code close the lock and look at the code again
  36. Accept the incoming call from Jet Pack Guy
  37. Talk to Jet Pack Guy then close your Spy Phone
  38. Use the Puffle Whistle to call the Black Puffle
  39. Click the Black Puffle then the pile of snow by the entrance to Herbert’s Underground Lair
  40. Once the Black Puffle clears away the snow click the brown Door Mat and the key to the Lair will be under it (Stupid Bear =P )
  41. Get the Key from your inventory and use it to unlock the lock
  42. When you get into his Lair answer the incoming call from Rookie
  43. Talk to Rookie then close your Spy Phone
  44. Keep scrolling till you see the Palm Tree
  45. Get the Spy Camera 3000 out and take a picture of it
  46. Scroll to the left and pick up the key laying by the Cream Soda barrel with wheels
  47. Scroll some more to the left until you see a door with a security system on the right of it
  48. Get the wrench from your tools
  49. Follow the onscreen instructions to loosen the bolts
  50. Get the scissors from your tools and cut the wires in the panel
  51. Go through the door into another part of Herbert’s Lair
  52. Scroll a little to the right and take a picture of his lab experiments with the Spy Camera 3000
  53. Now scroll a little over to the left and click the switch on the right side of the door (it will open yet another part of Herbert’s Lair)
  54. Scroll left some more until you reach the Fireplace, get the Key sitting on the top left of the shelf on the Fireplace
  55. Scroll to the right and go back to the first part of the Lair
  56. When you get to the first part of the Lair scroll right until you see another door that has tire tracks leading inside/cameras guarding the entrance
  57. When you encounter Klutzy you must mock his exact moves in only 2 seconds so he thinks your just his shadow, to do so match his movement (top screen) with the exact same movement out of the three on the bottom screen
  58. Once you’ve scared Klutzy off scroll to the left until you see some more things you need to photograph
  59. After you take the picture scroll a little left and get the pink key sitting on the middle shelf along side the Jet Pack
  60. Keep scrolling until you find a door that needs three keys to unlock it
  61. Click and drag each key to that door
  62. Once you’ve unlocked it go inside and photograph and get the Blueprints off the wall
  63. Answer the call from Rookie
  64. Close your Spy Phone and head back out the door
  65. Herbert will be there (he thinks your Klutzy though because of the disguise). When he asks you what your doing respond in this order 1: Click-Click-Click 2: the one that starts with Ka-Click 3: The one that starts with Click-Ka click
  66. When you try and leave Herbert will realize that someone stole his plans and put the Lair on lockdown
  67. Answer the incoming call from Jet Pack Guy
  68. Talk to Jet Pack Guy then look for an opening in the roof
  69. Keep scrolling till you see a bright light shining in by the cardboard palm tree
  70. Follow the onscreen instructions to open the skylight using your wrench
  71. Once you’ve loosened all the bolts either play Grapple Gadget or skip it
  72. When your out of Herbert’s Lair (wether you played Grapple Gadget or not) talk to Jet Pack Guy then go back to the Command Room (you don’t need to manually go back to the Command Room, you’ll teleport there automatically when finished talking to Jet Pack Guy)
  73. Talk to the EPF Team/Director to finish the Mission!
Mission 9 – Herbert’s Plan
  1. Talk to Dot and the rest of the team, you can select any option when talking to them
  2. Get the Heads-Up 3000 from Gary
  3. Keep talking and Gary will tell you about the special map, you will be using the Heads-Up 3000 to tell Dot, Jet Pack Guy and Rookie where to go and where to look for clues
  4. Tap an agent to select them, tap a location to move them and tap again for them to search for clues
  5. When you want Dot to look for clues you will need to match the disguise she wants
  6. When you want Rookie to look for clues you will need to spin a wheel and if it lands on one of the Spyglasses he will search
  7. When you want Jet Pack Guy to look for clues you will need to hit the moving target right in the center and he will then search for clues
  8. After you’ve found five clues you will automatically go to the Ice Rink with Dot, Rookie and Jet Pack Guy
  9. Dot, Rookie and Jet Pack Guy will all get caught in a trap and you will automatically go to the Command Room
  10. Talk with Gary and the Director
  11. Get the device from Gary that will help you track down Rookie
  12. Keep talking with Gary then take the grappling hook and jack hammer
  13. Once you’ve finished talking with Gary and the Director search for Rookie using the device Gary gave you (follow the arrow at the top of the screen, the closer you get the more bars will appear in the left corner and the weaker the signal gets the less bars/an X will appear)
  14. After following the tracking device, when you’re in the wilderness and come to a wall get the grappling hook from your inventory
  15. Follow the onscreen instructions and play Grapple Gadget or skip it
  16. When you’ve finished Grapple Gadget (or skipped it) you’ll be at the top of the mountain and two Puffles will be in a cage frozen in ice. Use your Puffle Whistle to call the Yellow Puffle
  17. Click on the Yellow Puffle then the cage for the Puffle to break the ice
  18. Once the Puffle’s broken the ice use your wrench to loosen the screws on the cave
  19. When you’ve freed the Puffles scroll right and talk to Rookie
  20. Use the Puffle Whistle to call the Green Puffle
  21. Click the Green Puffle then Rookie’s hat to get it down for him
  22. Get Rookie’s hat from your inventory and give it back to him
  23. Talk to Rookie then take the fishing pole from him
  24. Scroll over a little to the big pile of snow blocking the entrance into the mountain
  25. Drag the Jackhammer to the pile of snow to play Jackhammer (or skip it)
  26. When you’ve completed (or skipped) the Jackhammer game you will be on the other side of the mountain where Jet Pack Guy is trapped
  27. Use your Puffle Whistle to call the Blue Puffle
  28. Click on the Blue Puffle then on the Puffle stuck in the balloon. The Blue Puffle will burst the bubble freeing the Purple Puffle
  29. Open your inventory and drag the fishing pole to Jet Pack Guy
  30. Follow the onscreen instructions to reel in Jet Pack Guy
  31. Once you’ve reeled him in call the White Puffle using the Puffle Whistle
  32. Click the White Puffle then on the Jet Pack and the Puffle will freeze it
  33. Get the scissors from your inventory and get the ropes off of Jet Pack Guy
  34. Go back through the tunnel and back to Rookie
  35. Scroll all the way to the left then go up the side of the mountain
  36. Follow the onscreen instructions to play Amazing Maze or skip it
  37. Once you’ve finished Amazing Maze (or skipped it) you will be higher on the Mountain
  38. There will be a cage with a cardboard tree in front of it, use the Puffle Whistle to call the Blue Puffle
  39. Click the Blue Puffle then the tree and the Puffle will knock it down with a Snowball
  40. Get the propeller and all four blades
  41. Combine them in your inventory
  42. Follow the onscreen instructions to fix the Windmill
  43. Drag the Propeller over to the Windmill
  44. Use your Puffle Whistle to call the Black Puffle
  45. Click the Black Puffle then the propeller so he can weld them together
  46. Scroll over to the right and get the grapple out of your inventory
  47. Click on the mountain to start Grapple Gadget (you can either play it for extra coins or skip it)
  48. When you arrive at the top of the mountain talk to Herbert and your team
  49. Pick up all the slabs of ice stuck in the snow
  50. Once you pick that last one up follow the onscreen instructions to reflect the beam of light onto the magnifying glass and destroy it
  51. Talk to your team until you hear a big bang, You’ve complete the Mission!
Mission #10 – The Ultimate Mission
  1. Talk to the Team then answer the incoming call from the Director
  2. Talk to the Director then finish talking with your team
  3. Answer the incoming call from Gary
  4. Close your Spy Phone and G will teleport you to the Geyser
  5. Talk to Rookie/Dot then open your Spy Phone and tell G whats going on
  6. Close your Spy Phone after you’ve talked to Gary and select the first option
  7. Talk to Dot then ask Rookie to start looking for things to plug the Geyser
  8. Answer the incoming call from Jet Pack Guy
  9. Talk to Jet Pack Guy then open your map and go to the Ski Village
  10. When you get to the Ski Village, talk to Jet Pack Guy then Herbert
  11. After you talk to Herbert talk to Jet Pack Guy again
  12. Once your done talking to Jet Pack Guy talk to Herbert again
  13. When you’ve finished talking to Herbert scroll to the right and pick up the rubber duck
  14. Use your map to go to the Iceberg
  15. Talk to Gary
  16. Use your map and go to the Ski Village then into the Ski Lodge
  17. Now go up into the Attic
  18. Scroll left a little bit until you see a box with a blanket tied over it
  19. Get out your scissors and cut the rope
  20. Take the Pink Octopus that is inside of the box
  21. Use your map and go to the Town, then into the Night Club and down to the Boiler Room
  22. Scroll right a little bit until you see a blue inflatable dolphin, pick it up
  23. Open your map and go to the Plaza then down to the Pool
  24. Scroll left until you see a life preserver
  25. Pick up the life preserver and put it in your inventory
  26. Go back to the Iceberg and give G the Octopus, Life Preserver and Dolphin
  27. Take the Super-Heluim from Gary then follow the onscreen instructions to play Aqua Rescue or skip it
  28. When you finish Aqua Rescue talk to Gary
  29. Go to the Plaza and talk to Dot
  30. After you talk to Dot go into the Pizza Shop and talk to the Chef
  31. Scroll a little to the left, get out your scissors and cut the end of the mop off
  32. Scroll more to the left a and take the dented pan off one of the tables
  33. Go back to the Plaza and into the Stage
  34. Talk to the Stage Director and ask if you can use some costumes
  35. Get the white beard off the ground
  36. Drag the white beard to the black paint that is next to the Stage Director
  37. Follow the onscreen instructions to paint the beard black
  38. Now go back to Dot and give her the dented pan, the end of the mop (looks like a wig) and the black beard
  39. Follow the onscreen instructions to to balance the island (when trying to get certain penguins to follow you to certain locations look on the top screen, the penguins wearing certain outfits like Rockhopper’s hat or Cadences scarf, just those penguins will follow you when you move to a different location)
  40. When you’ve finished balancing the island answer the incoming call from Gary
  41. Talk to Gary then go to the Town and into the Gift Shop
  42. Scroll left until you see a Yellow/Orange Swim Vest, pick it up and put it in your inventory
  43. Scroll to the right until you see two light blue arm floats (by the changing rooms), pick them up and put them in your inventory also
  44. Keep scrolling some more until you see the stairs that lead upstairs
  45. Go upstairs and pick up the duct tape on the desk
  46. Use your map and go to the Ski Village
  47. Drag the duct tape to Herbert’s popped balloon to patch the hole
  48. Now drag the Super-Helium Gary gave you to the balloon to blow it up
  49. After you fix the balloon put it in your inventory
  50. Get your scissors and cut the belt thats running the Ski Lift (your scissors will break but Klutzy will cut it for you)
  51. Use your Puffle Whistle to call the Purple Puffle
  52. Click on the Purple Puffle then Klutzy
  53. Once Klutzy is in the bubble call the Red Puffle
  54. Click the Red Puffle then the bubble/Klutzy for the Red Puffle to pop the bubble
  55. After Klutzy cuts down Herbert talk to Jet Pack Guy/Herbert
  56. Get the Rubber Duck, Arm Floats and Swim Vest to Herbert
  57. Talk to Rookie then answer the incoming call from Gary
  58. Talk with Gary then go to the Mine Shack
  59. When you get to the Mine Shack talk to the team/Herbert
  60. Go back to the Ski Village and talk to Herbert
  61. Get the patched balloon from your inventory and drag it to basket (behind Herbert) to repair the Balloon
  62. Return to the Mine Shack and talk to the team again
  63. Follow the onscreen instructions and play JackHammer (or skip it)
  64. Once you’ve finished playing JackHammer (or skipped it) talk to Gary
  65. Use your Puffle Whistle to call the White Puffle
  66. Click on the White Puffle then the geyser
  67. Talk to the team then answer the incoming call from Herbert
  68. Close your Spy Phone and call Klutzy using the Puffle Whistle
  69. Click on Klutzy then the statue and he will get the ropes to release the statue
  70. Answer another incoming call from Herbert
  71. Use your Puffle Whistle to call the Purple Puffle
  72. Click on the Purple Puffle then the anchor behind Rookie
  73. Now call the White Puffle again
  74. Click on the White Puffle then the statue
  75. Follow the onscreen instructions to ice weld the statue
  76. Talk to your team to find out if it worked…
  77. Answer the incoming call from the Director
  78. Talk to the Director to find out your next orders….throw a WATER PARTY!!!

    Secrets:

    How to beat the Game at a 100%

    1. Complete the missions
    2. Beat all levels of the mini-games with all gold medals
    3. Collect the Snake tiles

    Snake Game Tokens

    • Snake Medals are hidden in all the Virtual missions, (Missions 2-7). When you collect them all, you get a game on your spy phone! Here are the locations of all the Tiles:

    Mission 2: Secrets of the Fur

    • Take the goggles once you get them, go to the snow forts. Use Flare to melt the snow. Then play the mini game and collect your tile

    Mission 3: Questions for a Crab

    • Go to the river by Herbert’s Base, use Loop to catch the fish jumping out of the water

    Mission 4: Mysterious Tremors

    • Before you go to the Boiler Room to catch Herbert, use Chirp on the machine to get the tile!

    Mission 5: Operation Spy and Seek

    • If you go to the Mine Shack, to the right there will be a Anvil. Use Pop to lift it, then grab the tile

    Mission 6: Waddle Squad

    • After you set the table up for the Gift Shop clerk, talk to him. He will ask you to fix the safe. Use Flare to weld it, then use the Wrench to open it. Inside will be the game token.

    Mission 7: The Veggie Villain

    • When you Reach the ladder, move your cursor to the patch of corn to your left. Go into the corn, then use Chill to cross the water and pick up the tile

    Hidden Coins!

    • All around Club Penguin, there are hidden motions to some items. If you click on them, 1 coin will appear! An example is at the Lighthouse, if you click the Piano, a coin will come out.

    Transfer your items to your online account!

    • Different from the first game, if you connect to Nintendo Wi-Fi, you will get the items you collect for your penguin online

    Items and Puffles:

    Spy Gadget: Has 9 different Features.
    HQ Button: Teleports you directly to the HQ.
    Spy Log: Gives a record about last missions.
    Communicator: Lets you talk to other Agents.
    Wrench: Tightens Bolts
    Mechano-Duster: Cleans piles up.
    Scissors: Cuts ropes, strings, etc...
    Decoder: Lets you look at secret codes
    CombHelps fixing messy fur
    Snake Game: Lets you play Snake Game, collect all Snake Tiles in Missions 2-6
    Spy Puffles: 8 different colors.
    Red: Fires itself out of cannon. Breaks objects. (Blast)
    Blue: Fires Snowballs (Bouncer)
    Purple: Blows Large Bubbles that lifts up heavy objects. (Pop)
    Pink: Throws lassos at objects wrapping them up. (Loop)
    Green: Flies and knocks items down or gets items. (Flit)
    Black: Welds items. (Flare)
    Yellow: Plays flute and disrupts electrical items and breaks ice. (Chirp)
    White: Blows ice to freeze water. (Chill)
    Puffle Whistle: Summons Elite Puffles.
    Map: Goes to locations around CP.
    Clothing Inventory: Click on the Red Suitcase in Spy inventory.


    Easy & Fast Coins


    To get 235 coins in about 10 seconds, as many times as you want, do this:

    1. Go get your Nintendo DS
    2. Place the "Herbert's Revenge" gamecard there
    3. Turn on your DS
    4. Select the Herbert's Revenge game
    5. Tap on "Start"
    6. Tap on Countinue
    7. Tap on Minigames
    8. Tap on Amazing Maze Game
    9. Go to Bonus 2 level
    10. Get ALL of the coins there (235)
    11. Finish the level
    12. You get your 235 coins.
    13. Tap on "Continue"
    14. Enter Level 1
    15. Press "Start" button
    16. Select quit
    17. Tap "Yes"
    18. You recieved 235 coins!
    19. Do steps 14-17 as many times as you want to


    -Alighf, Club PenguCheats President


    NOTE: THIS GUIDE IS COPYRIGHTED BY CLUBPENGUCHEATS.COM! YOU ARE NOT ALLOWED TO COPY IT! THIS GUIDE HAS PERMISSION TO BE IN THIS SITE!